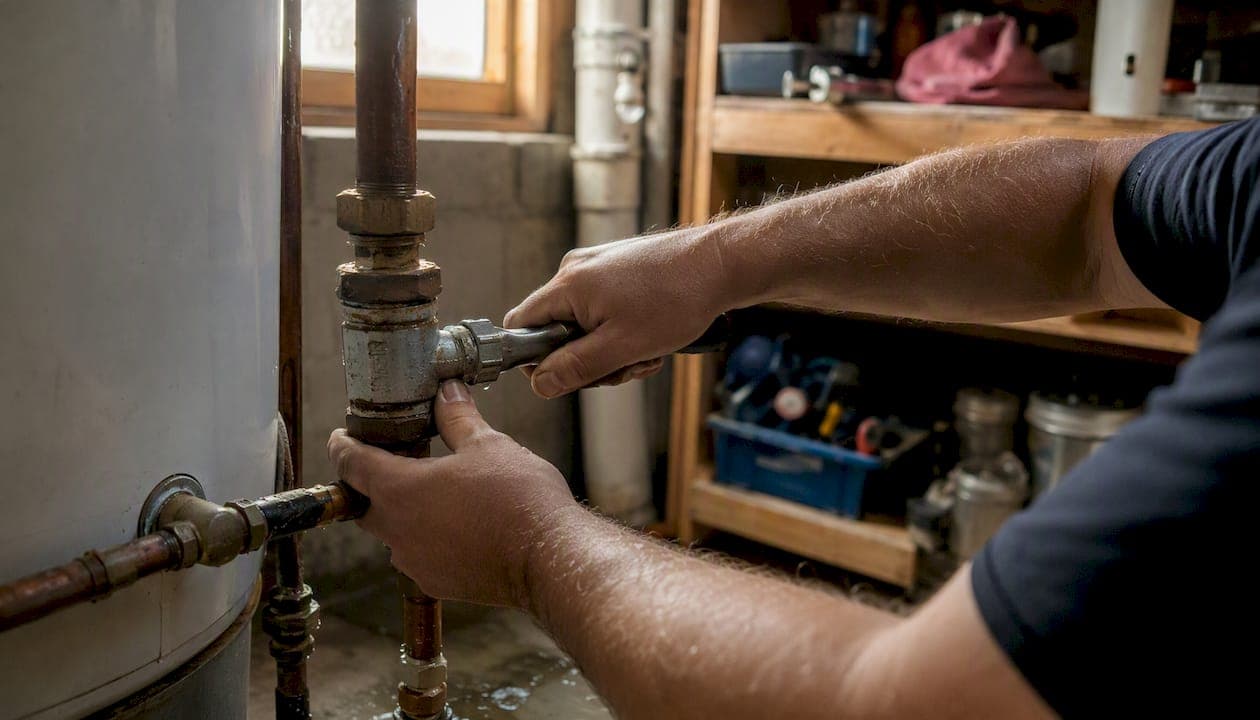
Weak hot water almost always comes down to four things: a clogged fixture, a restriction inside the water heater, a valve that's not fully open, or a pipe problem. The good news is you can usually pinpoint which one it is in about five minutes, before you spend a cent or pick up the phone.
Run these three checks first:
- Compare hot and cold at the same tap. If cold runs strong and hot dribbles, the fault sits somewhere in the hot circuit, not your main supply.
- Test a second and third outlet. One weak tap points to a local clog. Every tap running weak points to the heater, a valve, or the pipework feeding the whole house.
- Pull off the aerator or showerhead. If flow improves noticeably with it removed, you've likely found your culprit right there.
If those checks show the problem is isolated to one fixture, you can probably sort it yourself this afternoon. If every hot tap in the house is weak, or you spot a leak, smell gas, or notice rust-coloured water, stop and call a licensed plumber before you do anything else.
Key Takeaways
Low hot water pressure almost always traces back to a clogged fixture, sediment inside the heater, a partly closed valve, or a narrowed pipe, and testing hot against cold at multiple outlets tells you which.
| Point | Details |
|---|---|
| Test before you touch anything | Compare hot to cold at one tap, then check two more outlets, before assuming the worst. |
| Clean fixtures first | Soak scaled aerators and showerheads in vinegar. It solves a large share of single-tap complaints on its own. |
| Check every valve is fully open | Even a valve sitting at 90% open can noticeably choke flow without looking closed at all. |
| Flush the tank annually | Sediment buildup inside the heater is the most common cause of house-wide weak hot water. |
| Call a pro for house-wide issues | Dualflowservices sends a licensed plumber to pressure test, check valves and heater internals, and quote your options on the spot. |
Table of Contents
- Why is my hot water weak: quick tests to isolate the cause
- Common causes of low hot water pressure explained
- When the water heater is the culprit: fixes you can try safely
- Mixing valves, shutoffs and pressure regulators: how they choke flow
- Pipe and supply problems that starve hot water flow
- How to measure hot water pressure at home
- A step-by-step troubleshooting plan for low hot water pressure
- Simple DIY fixes worth trying before you call anyone
- When to call a licensed plumber
- Maintenance that stops low pressure coming back
- If you'd rather have a pro check it, here's how Dualflowservices helps
- Frequently asked questions
- Sources
Why is my hot water weak: quick tests to isolate the cause
Give yourself five minutes and a torch before you touch anything. The order you test in matters, because each step rules out a whole category of causes.
- Run hot and cold side by side at one tap. Turn the hot on full, then the cold on full, and watch the difference. Even pressure on both sides but low overall usually means a mains or main-line issue. Strong cold with weak hot means the restriction is downstream of the heater.
- Check three separate fixtures, ideally at different distances from the heater: a bathroom tap, the kitchen sink, and the shower. A practical diagnostic rule plumbers use is simple: if hot is weak everywhere but cold is fine, look at the heater, the valves, or the hot pipe run. If both hot and cold are weak at every outlet, the pressure-reducing valve or the street supply is more likely the cause.
- Unscrew the aerator on the weakest tap with pliers wrapped in a cloth (to protect the chrome) and inspect the mesh screen for grit, scale flakes, or a greenish tinge that suggests copper corrosion.
- Look at the shutoff valves on top of or beside your water heater. Note whether the handle sits parallel to the pipe (fully open) or at an angle.
- Check under sinks and behind the washing machine for small isolation valves that might have been nudged closed during renovations or a previous repair.
You need almost nothing for this: a torch, a pair of pliers or an adjustable wrench, and an old towel. If your heater is gas, don't touch the gas cock or pilot assembly during these checks. If it's electric, don't open the element covers. Isolating power or gas safely is a job for a tradesperson, not a five minute DIY test.
Pro Tip: If you find a valve that's not fully open, turn it gently and stop the moment it meets resistance. Cranking an old gate valve past its natural stop can snap the stem, turning a free five-minute fix into an emergency callout.
Common causes of low hot water pressure explained
Once you know whether the problem is one tap or the whole house, match your symptoms against these usual suspects.
- Clogged aerators, showerheads and cartridge ports. Fixture-level buildup inside the small mesh screens and cartridge inlet holes is the single most common cause of one weak tap, and it's the cheapest to fix.
- Sediment and scale inside the water heater. Minerals settle at the bottom of the tank and can clog the hot outlet or heat-trap nipples, choking flow to every hot tap in the house at once.
- Partially closed service valves. A valve doesn't need to be fully shut to cause trouble. Even one that's 90% open can noticeably throttle flow, and it's easy to miss because water still comes out.
- Faulty mixing or tempering valves. These devices blend hot and cold to a safe delivery temperature, and when they clog or fail, cold water can backfeed into the hot line, leaving you with weak, lukewarm flow instead of proper hot pressure.
- Corroded or undersized pipework. Old galvanised steel pipes narrow from the inside over decades, and even modern pipe can restrict flow if a run is too thin for the fixtures it feeds.
- Cross-connections after plumbing work. If you've recently had a heater replaced or pipework altered, debris knocked loose during the job can settle in an aerator or cartridge days or weeks later.
When the water heater is the culprit: fixes you can try safely
Hot water heaters clog from the inside out, and it happens faster than most people expect. Heat accelerates mineral precipitation, so dissolved minerals drop out of the water and settle in the tank far quicker than they would in a cold pipe. That sediment layer builds on the tank floor and gradually blocks the outlet fitting and the narrow heat-trap nipples designed to stop heat loss.
Flushing the tank is the standard fix, and it's something most homeowners can do with basic tools:
- Turn off the power or gas to the heater and let the water inside cool for at least an hour. Skip this step and you risk a serious scalding injury.
- Close the cold water inlet valve at the top of the tank.
- Connect a garden hose to the drain valve near the base and run it to a floor drain or outside.
- Open the drain valve and a nearby hot tap to break the vacuum, then let the tank empty completely.
- Flush with the cold inlet briefly opened and closed a few times until the water running out is clear, not cloudy or gritty.
- Close the drain valve, refill the tank fully, and purge air from the hot taps around the house before switching power or gas back on.
While you're in there, check the parts most likely to cause flow loss. The dip tube directs incoming cold water to the bottom of the tank, and a cracked or disintegrating dip tube lets cold water short-circuit straight to the outlet, which shows up as inconsistent temperature as much as low pressure. The anode rod sacrifices itself to corrosion so your tank doesn't, and a heavily eaten-away rod is a sign the tank interior is ageing too. The outlet nipple and heat-trap fittings are narrow by design, so they're the first thing to choke when sediment moves.
You can inspect the anode rod and dip tube visually, but replacing them, or diagnosing a tank that's rusting from within, is a plumber's job. If your heater is more than 10 to 15 years old, keeps producing sludgy water after a flush, or shows visible rust at fittings, replacement is the more sensible outcome than repeated repairs.
Pro Tip: Mark your heater's install date on the tank itself with a permanent marker before you forget. It sounds trivial, but "how old is this thing?" is the first question every plumber asks, and homeowners rarely know off the top of their head.
Mixing valves, shutoffs and pressure regulators: how they choke flow
A tempering valve (sometimes called a mixing valve) blends hot water from the tank with cold to deliver a safer temperature at the tap, which matters because most heaters store water well above scalding point. When the valve's internal components clog with scale or the moving parts wear out, it can restrict overall flow or let too much cold bleed into the hot line, leaving you with weak, tepid water at every fixture it feeds.
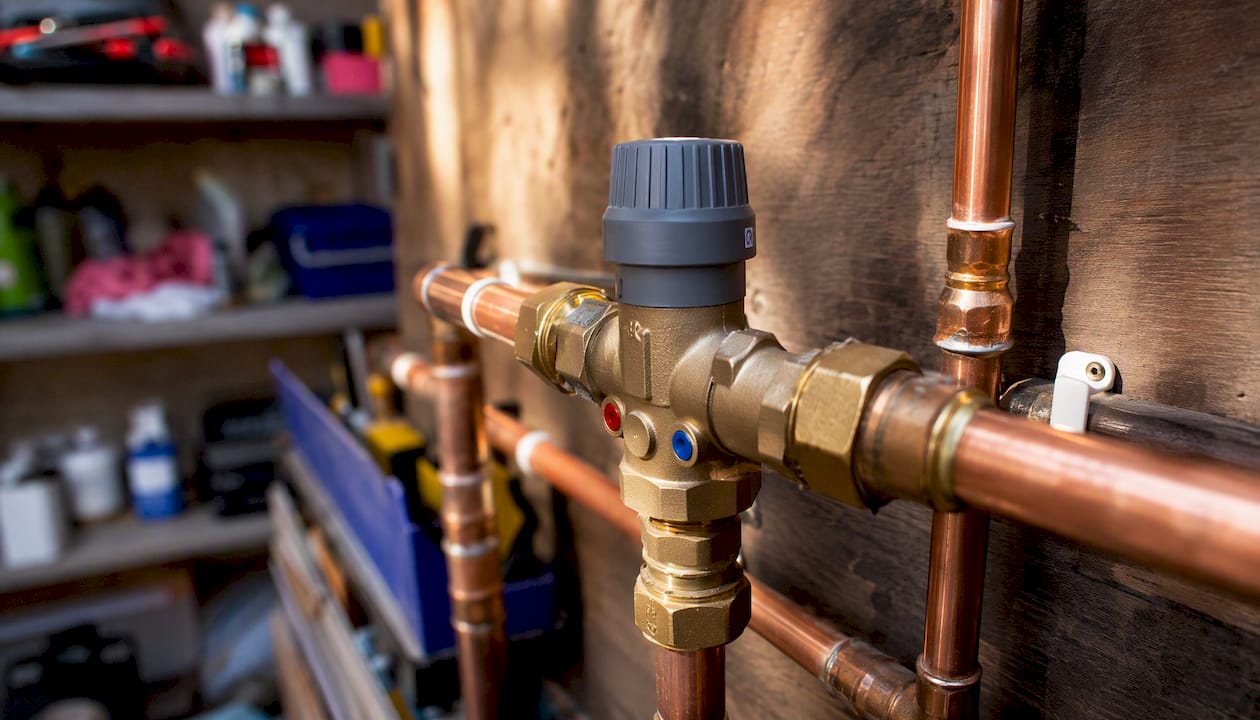
Service valves are a quieter problem, because they don't announce themselves. A gate valve partially closed will restrict flow gradually as you turn it, while a ball valve either blocks flow sharply near its closed position or barely affects it at all until it's mostly shut. Under-sink stop valves behave similarly.
Pressure-reducing valves (PRVs) regulate the pressure coming in from the street main before it reaches your house. A failing PRV typically drags down both hot and cold together, but because hot lines already run narrower due to fittings like tempering valves and heat traps, a struggling PRV sometimes shows up more obviously on the hot side first.
A few safety notes worth taking seriously:
- Never remove or dismantle a tempering valve without isolating both the hot and cold supply first, hot water at tank temperature can scald on contact.
- Don't attempt to adjust a PRV yourself if you're unsure what you're doing. Winding it the wrong way can send pressure spiking well above safe limits for your pipework and fittings.
- If your property serves vulnerable residents, aged care or disability accommodation among them, tempering valve compliance is a safety issue, not just a comfort one. Guidance on disability-compliant hot water systems is worth reviewing if you manage that kind of property.
Pipe and supply problems that starve hot water flow
Pipework doesn't fail overnight, it degrades over years, and hot water usually feels the effects before cold does.
- Internal corrosion in galvanised steel pipe. The zinc coating that protects galvanised pipe breaks down over time, and hot water speeds up the mineral and rust buildup that narrows the pipe's internal bore. A pipe that started life at 20mm can effectively shrink to a fraction of that over several decades, and you'd never know just by looking at the outside.
- Undersized trunk lines or long thin branch runs. If your home was plumbed decades ago for one shower and one kitchen tap, and you've since added a second bathroom or a dishwasher, the original pipe sizing may simply not carry enough volume for everything running at once.
- Kinked PEX or collapsed flexible connectors. These often turn up after a bathroom reno or a DIY job where a flexible line got pinched behind a cabinet or wall. If your pressure drop coincides with recent renovation work, this is worth checking first.
- Hidden leaks. A slow leak inside a wall or under a slab bleeds pressure away from your fixtures without any obvious sign at the surface.
To check for a hidden leak yourself, turn off every tap and appliance in the house, then go to your water meter. If the small leak indicator dial is still turning with everything off, water is escaping somewhere you can't see. That's a call-a-plumber situation, not a DIY one, because tracing a concealed leak usually needs proper detection equipment.
How to measure hot water pressure at home
Numbers beat guesswork, and if you can hand a plumber an actual pressure reading, you'll usually get a faster and more accurate diagnosis, because it rules out entire categories of fault immediately.
You'll need a simple pressure gauge that screws onto a garden tap or hose bib fitting, available cheaply from any hardware store. Screw it onto an outdoor tap or a washing machine hot outlet, turn the tap on fully, and read the static pressure. Then open a couple of other taps in the house to simulate normal use and read the running pressure again, that drop tells you how much your system sags under simultaneous demand.
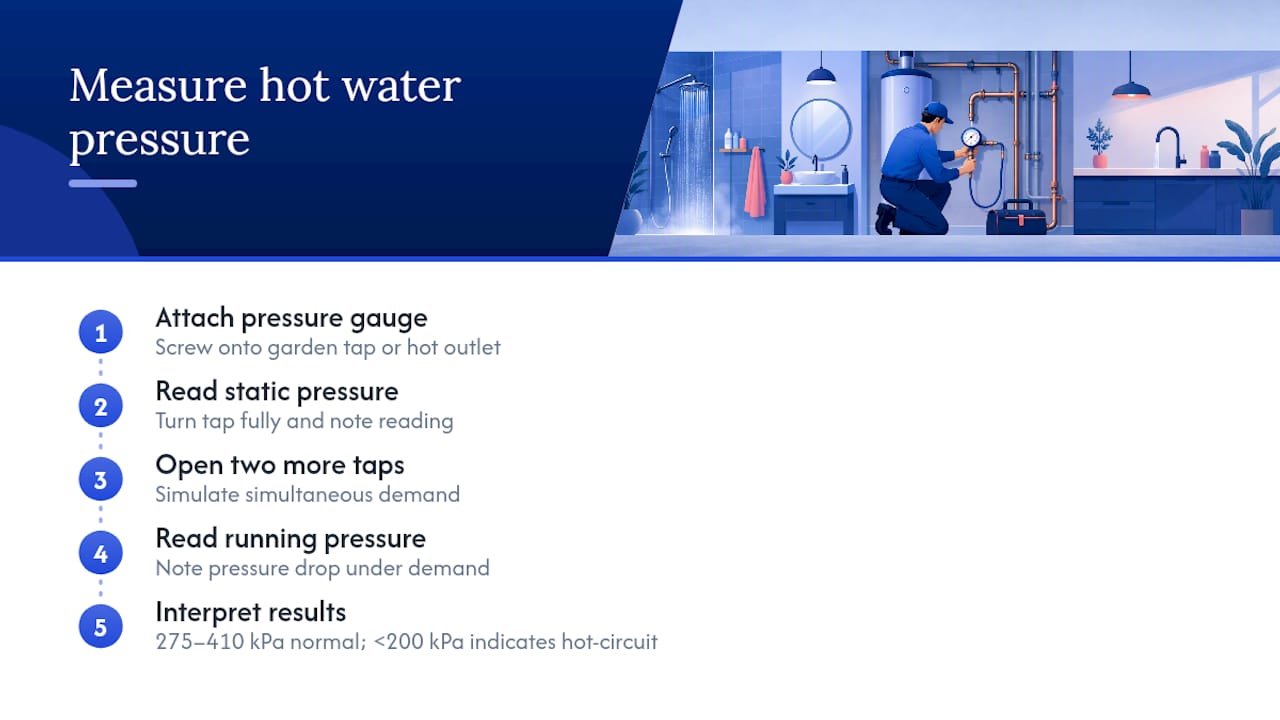
Most Australian homes sit comfortably in the 275 to 410 kPa (40 to 60 PSI) range for everyday comfort. If your reading comes back well under 200 kPa at the hot tap while cold reads normal on the same test, that's solid evidence the restriction is inside your hot circuit specifically, not a whole-house supply problem.
Resist the urge to crank pressure up yourself if you find it's genuinely low. Pushing pressure above the safe range stresses ageing pipe joints, tempering valves and tank fittings, and can turn a minor drip into a burst pipe. Adjusting supply pressure properly is a plumber's job.
A step-by-step troubleshooting plan for low hot water pressure
Work through these in order. Each step is designed to rule something out before you move to the next, so you're not flushing a perfectly healthy tank when the real problem was a $5 aerator.
- Clean or replace the aerator and showerhead on your weakest fixture and retest.
- Test three or more outlets to confirm whether the problem is isolated or house-wide.
- Check every visible service valve, at the heater, under sinks, behind the washer, and confirm each is fully open.
- Flush the tank if it's been more than 12 months, or check your tankless unit's manufacturer guidance for its own maintenance schedule.
- Measure pressure at a hot outlet and compare it to a cold reading on the same tap.
- Call a licensed plumber if the problem persists across multiple outlets, or immediately if you notice any of the warning signs below.
Before that call, jot down a few things that will save the plumber time on arrival:
- Which fixtures you tested and what you found at each.
- Your measured pressure in kPa or PSI, both static and running.
- Any unusual noises, smells, or discoloured water.
- The approximate age and type of your water heater (gas, electric, or tankless).
Stop everything and call immediately if you spot a visible leak, smell gas near the heater, notice signs of rust or corrosion at fittings, or if debris was likely disturbed during recent plumbing work and you're now getting inconsistent flow that wasn't there before.
Simple DIY fixes worth trying before you call anyone
A surprising number of low pressure calls get solved without a tradesperson ever picking up a tool. Try these first, in roughly this order of ease.
- Soak the aerator and showerhead in white vinegar for a couple of hours to dissolve scale, then rinse and reattach. This alone resolves a large share of single-fixture complaints.
- Fully open every service valve you can find, at the heater, under sinks, and at the washing machine, turning gently until each stops naturally.
- Run a brief tank flush if the heater has been off and cool for at least an hour and you're confident isolating it safely. Skip this entirely if your heater is gas and you're not comfortable with the pilot and gas cock, that's a job to hand over.
- Replace a clearly worn showerhead or cheap cartridge rather than repairing it. A basic cartridge or showerhead costs a fraction of a callout fee, and if it's visibly scaled or cracked, replacement is usually more cost-effective than trying to clean it back to working order.
When to call a licensed plumber
Some signs mean it's time to stop troubleshooting and pick up the phone straight away.
- Every hot tap in the house runs weak, and cleaning fixtures and checking valves hasn't changed anything.
- You see visible corrosion, rust-coloured water, or staining around fittings and joints.
- There's an active leak anywhere near the heater or along a pipe run.
- You smell gas, or you're not confident isolating a gas or electric heater safely yourself.
- The water meter's leak indicator is still spinning with every tap in the house turned off.
When a plumber arrives, expect them to run through a structured check: pressure readings at multiple outlets, an inspection of the pressure-reducing valve, a look inside the heater at the anode and dip tube, a check of any tempering or mixing valves, and a visual assessment of pipe condition where it's accessible. They'll also trace for leaks using equipment that goes beyond what a homeowner can reasonably do with a torch and a Saturday afternoon.
The outcome usually falls into one of a few categories: a quick clean or part replacement, a PRV repair or swap, a partial repipe where corrosion has genuinely narrowed the bore, or a heater repair or full replacement if the tank itself is past its useful life. If you're managing an older property or considering a broader upgrade, it's worth looking at modern bathroom plumbing options that solve flow issues at the source rather than patching around them repeatedly. Before booking anyone, it's reasonable to check their licence details, contractor licensing bodies like the QBCC licence lookup let you confirm a tradesperson is properly registered before they set foot on your property.
Maintenance that stops low pressure coming back
Prevention here is genuinely cheap compared to the alternative. A little routine attention keeps sediment, scale and valve problems from creeping back in.
- Flush your tank annually. Regular flushing is one of the most effective single things you can do to protect both pressure and heater efficiency over the long run.
- Descale aerators and showerheads every three to six months, more often if you're in a hard water area.
- Visually check accessible service valves twice a year to confirm nothing's been nudged closed.
- Keep a simple log: install date, last flush date, any parts replaced, and any pressure readings you've taken. It sounds excessive until the day you need to hand that history to a plumber and it saves them (and you) a callout's worth of guesswork.
If you're in a genuinely hard water area, it's worth a conversation with a plumber about whether a water softener or more frequent anode rod checks make sense for your property, hard water accelerates every problem covered in this guide, from scale buildup to valve wear. Property managers running facilities on a preventative maintenance schedule tend to catch these issues months before residents ever notice a drop in pressure.
Pro Tip: If you're topping up a water softener or checking an anode rod yourself, take a photo each time and date it. Six months from now, "when did I last check that?" is a question you'll actually need answered.
A local plumber's perspective on chasing down weak hot water
Most low pressure callouts follow a predictable pattern once you've seen enough of them: it's rarely the dramatic pipe failure homeowners fear, and far more often something small that's been quietly getting worse for months. A scaled aerator here, a valve someone bumped during a bathroom reno there. The house-wide cases, where every tap runs weak, tend to trace back to the tank or a tempering valve rather than the street supply, which surprises people who assume the problem must be "upstream" somewhere out of their control.
The habit worth building isn't fancy. It's testing before guessing: hot against cold at the same tap, then a second outlet, before touching a single fitting. Homeowners who do that before calling save themselves money and save the tradesperson a slower diagnosis. When Dualflowservices attends a job like this across Mornington Peninsula properties, that's exactly the sequence we run through first, because it narrows the fault fast and stops anyone paying to replace a heater when the real problem was a $5 part.
What I'd tell any property manager, particularly those running aged care or disability accommodation where hot water reliability isn't just a comfort issue, is that the small annual habits matter more than the big emergency fixes. A flush and a valve check once a year prevents most of the callouts that would otherwise turn into a same-day emergency.
If you'd rather have a pro check it, here's how Dualflowservices helps
Dualflowservices gets you a licensed plumber on site with a pressure gauge and proper diagnostic gear, rather than a guessing game with a wrench and a Saturday afternoon. If you've run the checks in this guide and you're still stuck, or you'd simply rather not mess with an isolated water heater yourself, that's exactly the gap we fill for homes, businesses, and aged care and disability facilities across the Mornington Peninsula and surrounding Melbourne suburbs.

A typical callout starts with the same diagnostic sequence covered above: pressure testing at the affected outlets, a check of every visible valve, and an inspection inside the heater if that's where the trail leads. You'll get a licensed tradesperson who isolates gas or electrical supply safely before touching anything, and a written quote with your options laid out clearly, whether that's a simple valve adjustment, a tank flush, or a heater replacement if the unit's reached the end of its working life. For facilities managing hot water compliance across multiple units, our preventative maintenance approach can catch these issues on a schedule rather than waiting for a resident to report cold showers.
If your hot water's been weak for a while, book a service visit and get it properly diagnosed rather than living with it.
Frequently asked questions
Why is my hot water pressure low but my cold water is fine? This pattern points to a restriction somewhere in your hot circuit specifically, most often sediment inside the water heater, a clogged fixture, or a faulty tempering valve, rather than a problem with your main water supply.
Can I fix low hot water pressure myself, or do I need a plumber? Fixture clogs and partly closed valves are usually safe DIY fixes. Whole-house problems, gas heater work, or anything involving a suspected leak or corroded pipework need a licensed plumber.
How do I know if the problem is my water heater or my pipes? If pressure is weak at every hot tap but a heater flush and valve check don't improve it, ageing or corroded pipework, particularly galvanised steel, becomes the more likely cause.
What pressure should hot water be running at in my house? Most Australian homes sit comfortably between roughly 275 and 410 kPa (40 to 60 PSI). Readings well below 200 kPa usually mean a restriction worth investigating.
How often should I flush my hot water tank? Once a year is the standard recommendation for most households, more frequently if you're in a hard water area where scale builds up faster.
Sources
- How to Increase Hot Water Pressure in the Whole House - Plumbing Guider
- What Causes Low Hot Water Supply? Common Fixes - HomePro Plumbing SD
- How to Fix Low Hot Water Pressure Fast - Daigle Plumbing
- Gardenspace