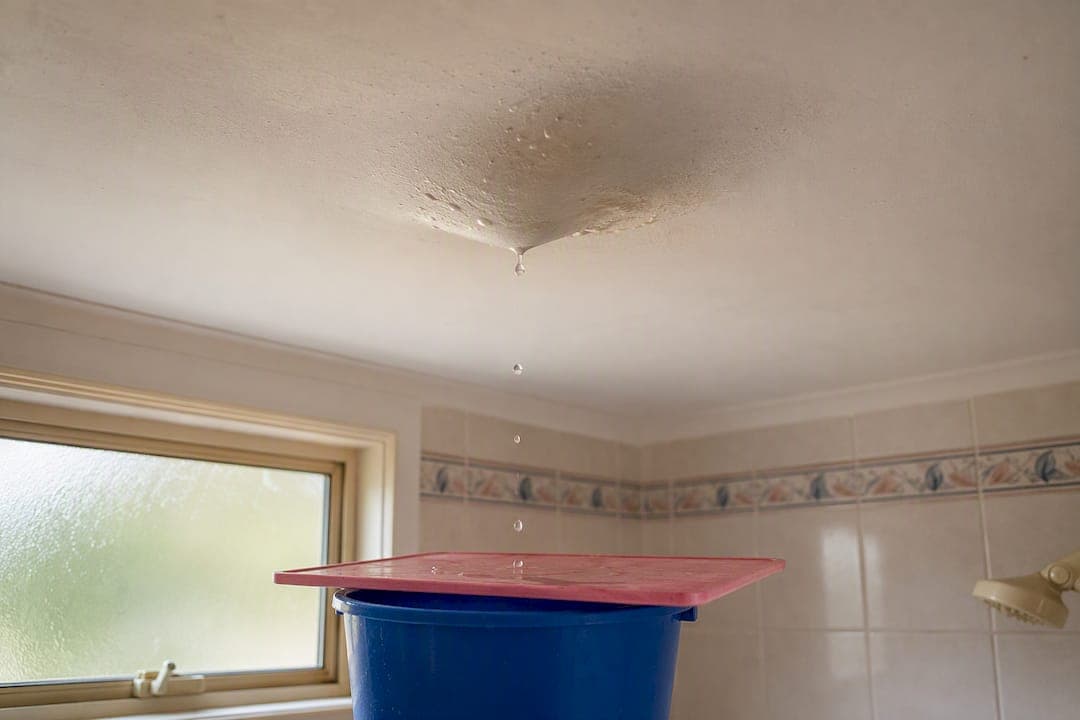
Turn off power to any light or fan near the wet patch, put a bucket or towels under the drip, and shut off the water at the fixture or the main if you think a pressurised pipe is behind it. Photograph the stain before you touch anything. If the drip is constant or the ceiling has started to sag, stop reading and call a licensed plumber now.
TL;DR:
- A constant leak indicates a pressurized supply pipe, while leaks only during showers usually point to waterproofing or drain failures; rain-related stains suggest roof issues.
- Use water meter, paper towel, toilet dye, and shower tests to identify the leak source before any demolition or patchwork begins.
- Stop a bulging ceiling safely by creating a controlled water drain through a small pilot hole, turning off power, and removing valuables from the area.
- Always repair the leak source first, such as replacing faulty pipes, resealing flashings, or fixing waterproofing membranes, before patching the ceiling.
- Regular maintenance like ventilating bathrooms, checking seals, and cleaning gutters can prevent most recurring ceiling leaks.
Table of Contents
- What to do in the first 10 to 30 minutes
- Is it plumbing, tanking, roof or condensation?
- When and how to relieve a bulging ceiling safely
- Who do you call first: plumber, tiler, roofer or electrician?
- How trades assess the damage before anyone patches it
- What repairing the leak and the ceiling actually involves
- How to stop this happening again
- Who's behind this advice
- Why most homeowners skip the tests that would save them money
- Get an emergency plumber out for your bathroom ceiling leak
- Sources
What to do in the first 10 to 30 minutes
A bathroom ceiling leak is a race against two things: electrical risk and structural weight. Water and light fittings don't mix, and a plasterboard ceiling loaded with water can fail without warning. Work through these steps in order, not all at once.
- Kill the power to any circuit feeding a downlight, exhaust fan or heater in the wet zone at your switchboard. Never touch a wet light fitting or switch to check it first.
- Catch the water. Slide a bucket or bin under the drip and lay towels or a plastic sheet across anything below it, furniture, rugs, electronics.
- Shut the water off at the isolation valve under the toilet, basin or shower mixer if you can reach it safely. If you can't pinpoint the fixture, use the main stopcock.
- Photograph everything now, and again in an hour, to show whether the stain is spreading. This record matters later for both your plumbing report for insurance and the tradesperson who diagnoses the cause.
Don't wait for morning if the drip won't stop. A steady, pressurised leak from a supply line runs around the clock and can cause rapid structural damage if it's left overnight.
Pro Tip: Slide a plastic chopping board or a cheap sheet of plywood under the bucket before you start mopping up. It stops the timber floor beneath from taking on water while you're focused on the ceiling.
Keep this emergency plumbing checklist handy if this is your first time dealing with water coming through from above. It covers the same triage logic for other rooms too.
Is it plumbing, tanking, roof or condensation?
Timing tells you almost everything. A leak that drips constantly, day and night, points to a pressurised supply pipe. One that only appears during or straight after a shower usually means a failed drain assembly or waterproofing membrane behind the tiles rather than a burst pipe. Stains that only show up after heavy rain suggest a roof or flashing problem. A damp patch that grows in warm, humid months and shrinks in winter is often just condensation collecting on cold ductwork or an underinsulated roof space.
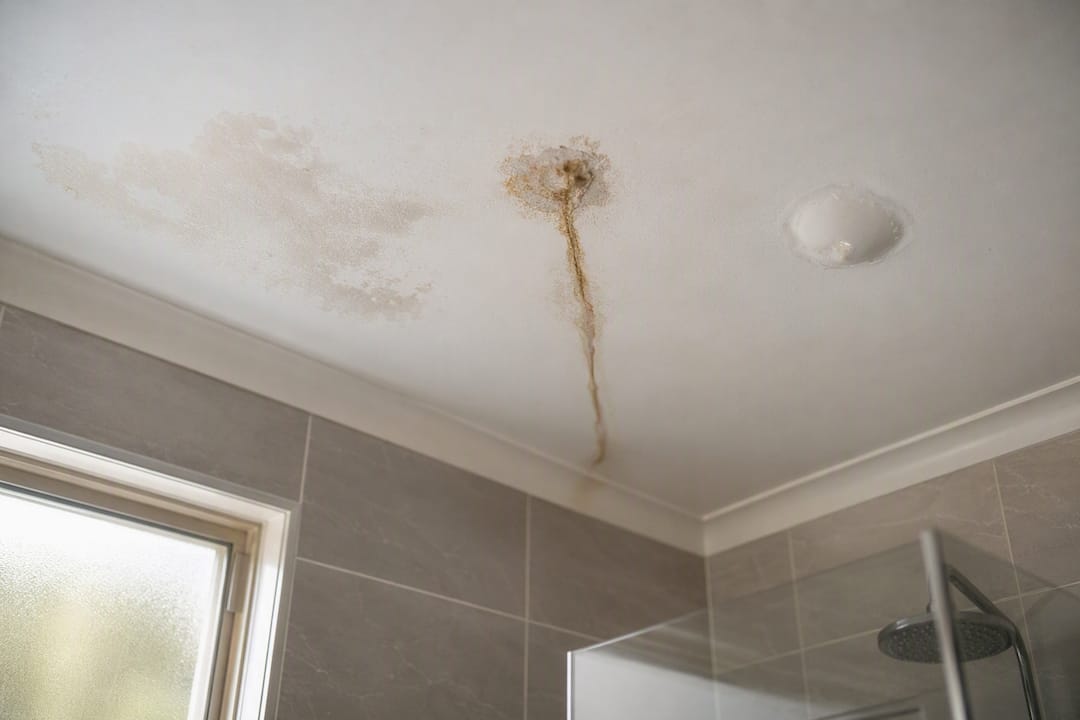
Most ceiling leaks fall into one of these buckets: plumbing supply, drain and waterproofing failure, roof intrusion, or condensation. Working out which one you've got before calling a trade saves an unnecessary visit and, often, an unnecessary hole in the ceiling.
Four tests will get you most of the way there without any demolition:
- The water meter test. Turn off every tap, shower and appliance in the house, then watch the meter for 30 minutes without touching anything. Movement on the dial in that window points to an active pressurised leak somewhere in the supply line. It's worth knowing how to read your water meter properly before you rely on this test.
- The paper towel test. Tape a few dry paper towels or a folded tissue over the stain and leave them for 24 hours. If they stay dry, you're likely looking at old condensation staining rather than an active leak. If they're damp, water is still moving through.
- The toilet dye test. Add food dye to the cistern, wait, and check whether coloured water appears at the ceiling stain. This isolates a leaking toilet base or wax ring from other possible sources.
- The controlled shower run. With the bathroom empty of towels and mats, run the shower for a set few minutes and watch the ceiling below. A leak that appears only during this test almost always traces back to the shower tray, hob, or tiled walls rather than a supply pipe.
Timing-based diagnostics like these cut down on unnecessary ceiling openings and, by extension, the cost of finding the fault. One detail catches most homeowners out: water rarely drips straight down from its source. It tracks sideways along joists and service runs before finding a gap in the plasterboard, so the wet patch on your ceiling can sit metres away from the actual leak point upstairs.
When and how to relieve a bulging ceiling safely
A ceiling that's ballooning downward is holding weight it was never built for, and plasterboard gives way suddenly, not gradually. If you see a bulge growing or the surface starting to sag, don't wait for a tradesperson to arrive before relieving the pressure, provided you can do it safely.
- Turn off power to that section of the house first, because water may already be tracking near wiring.
- Position a bucket or large bin directly under the lowest point of the bulge.
- Push a screwdriver or similar tool gently through the centre of the bulge to create a small pilot hole, letting the water drain in a controlled stream rather than all at once.
- Step back once the flow starts. Don't try to widen the hole or catch every drop, just let it empty.
This is standard practice among trades and building inspectors for a bulging ceiling, specifically because a controlled release is far safer than waiting for an uncontrolled collapse onto the floor below.
Pro Tip: Keep a stiff wallpaper scraper or a wide putty knife in your emergency kit. It punctures a bulge cleanly without tearing a jagged hole, which makes the eventual patch job smaller and cheaper.
Drape plastic sheeting over anything valuable nearby and pull rugs or furniture well clear of the drip radius. Once the immediate danger has passed, this becomes a job for a licensed plumber or a restoration contractor, not something to keep managing yourself.
Who do you call first: plumber, tiler, roofer or electrician?
Getting the right trade out first avoids paying for a callout that ends in "that's not my area." Match the fault to the specialist, not the symptom.
- Plumber: the first call for anything that behaves like a supply leak. They'll pressure test the pipework, repair or replace fittings, and check drain flanges and wax rings around the shower or toilet base.
- Tiler or waterproofing specialist: the right call when your diagnostic tests point to the shower recess or bath surround. Tilers and waterproofing specialists handle failed tanking membranes and grout or caulk breakdown; a plumber can't fix a membrane failure, and calling the wrong trade here is one of the most common reasons the same leak comes back six months later.
- Roofer: needed when stains only appear during or straight after rain. They'll check flashings, valleys and any roof penetrations like vent pipes or skylights near the bathroom's footprint.
- Electrician: brought in whenever water has been near wiring, light fittings or an exhaust fan. They isolate and test the affected circuit before anyone reconnects power to a wet area, which is non-negotiable if a downlight sat under the drip.
Some jobs need two trades in sequence. A shower leaking through the ceiling below often means a plumber checks the waste and drain assembly first, then a waterproofer inspects the membrane if the pipework tests clean. That handoff is normal, not a sign someone missed something the first time.
How trades assess the damage before anyone patches it
A quick patch over a stain that hasn't fully dried is one of the most common repeat failures in bathroom ceiling repairs. Trades use a moisture meter to map exactly how far the damp has spread through the ceiling and surrounding framing before they touch a paintbrush or a sheet of plasterboard.
- Small inspection openings get cut at a few points to check ceiling bays that don't show visible staining but might still be wet.
- Any insulation that's gone soft, sagging, or holding water gets pulled out and replaced. Wet plasterboard that's spongy to the touch comes down too, since it won't dry from the inside once it's saturated.
- High-velocity fans and dehumidifiers run for several days, sometimes longer depending on how much timber and insulation absorbed water.
- Moisture readings get logged over time rather than checked once. A stable, low reading held for 48 hours with a falling trend is generally treated as the benchmark before cosmetic repair starts.
Skipping this step doesn't just risk mould, though that's the most obvious consequence and it spreads fast in warm, damp cavity spaces. Framing timber left wet for weeks starts to lose structural strength, and a ceiling patched over damp insulation will often bubble or stain again within months, meaning you pay for the same repair twice.
What repairing the leak and the ceiling actually involves
Fix the source before you touch the ceiling. Painting over a stain or patching plasterboard while the underlying leak is still active is money spent twice, and it's the single most common mistake homeowners make trying to save on a callout fee.
- Supply-line leaks: a plumber repairs or replaces the pipe section, reseals fittings, and pressure tests the line before anyone closes anything up.
- Drain or tanking failures: this often means tiles off, the substrate inspected and dried, then re-tanking with a certified waterproofing membrane before retiling, especially in older bathrooms where the original membrane may never have been installed properly in the first place.
- Roof causes: flashing repairs, valley resealing, or penetration reseals around vents and skylights, sometimes with a section of roofing replaced if sarking or battens have deteriorated.
- Ceiling repair itself: a small, contained stain might only need a patch and repaint. A ceiling that's sagged or had a section cut out for drying usually needs a full bay of plasterboard replaced, and if joists or bearers have softened, a carpenter needs to replace the framing before new sheeting goes up.
Costs vary widely depending on how far the water travelled and how long it sat before anyone noticed. A contained plumbing fix and small patch sits at the low end; a full retanking, retiling and ceiling bay replacement with framing repair sits well above it. Insurance often covers sudden, accidental water damage (a burst pipe, for instance) but typically excludes damage from a leak that was left to run for months, which is another reason the photos from those first thirty minutes matter.
How to stop this happening again
Most repeat bathroom ceiling leaks trace back to the same three habits: poor ventilation, ageing seals, and gutters nobody's checked in years.
- Run the exhaust fan during every shower and for at least 20 minutes after, and confirm it vents outside rather than dumping moist air straight into the roof cavity.
- Check grout and silicone around the shower and bath every six months. Hairline cracks in caulk are the earliest warning sign of tanking failure, well before any stain shows on the ceiling below.
- Replace rubber supply hoses on washing machines and dishwashers near bathrooms every five years or so, since perished hoses are a common source of slow, hidden leaks.
- Clean gutters and downpipes each season. Overflowing gutters push water back under roofing and flashings, which shows up as a bathroom ceiling stain even though the fault is on the roof.
- If you're renovating, this is the moment to re-tank properly rather than tiling straight over an old, unverified membrane.
Pro Tip: Keep a small torch and a $10 moisture meter in a bathroom cupboard. A quick check behind the access panel every few months catches a slow leak long before it reaches your ceiling. A broader preventative plumbing maintenance routine catches most of this before it becomes an emergency call.
Who's behind this advice
This guide was written by Mike, a tradesman working across plumbing, electrical and heating and cooling, based on the Mornington Peninsula. Dualflowservices backs it up with real service capacity, not just advice:
- Emergency call-outs for active leaks, burst pipes and electrical isolation
- Scheduled maintenance and compliance checks for homes, aged care and retirement facilities
- A typical job runs: safety isolation, diagnostic testing, source repair, drying and monitoring, then ceiling remediation
Why most homeowners skip the tests that would save them money
The instinct when water shows up on a ceiling is to call whoever answers the phone first, usually a plumber, and hope for the best. That's not wrong, exactly, but it skips a step that costs nothing and takes twenty minutes: working out which of the four buckets you're actually dealing with before anyone arrives with tools.
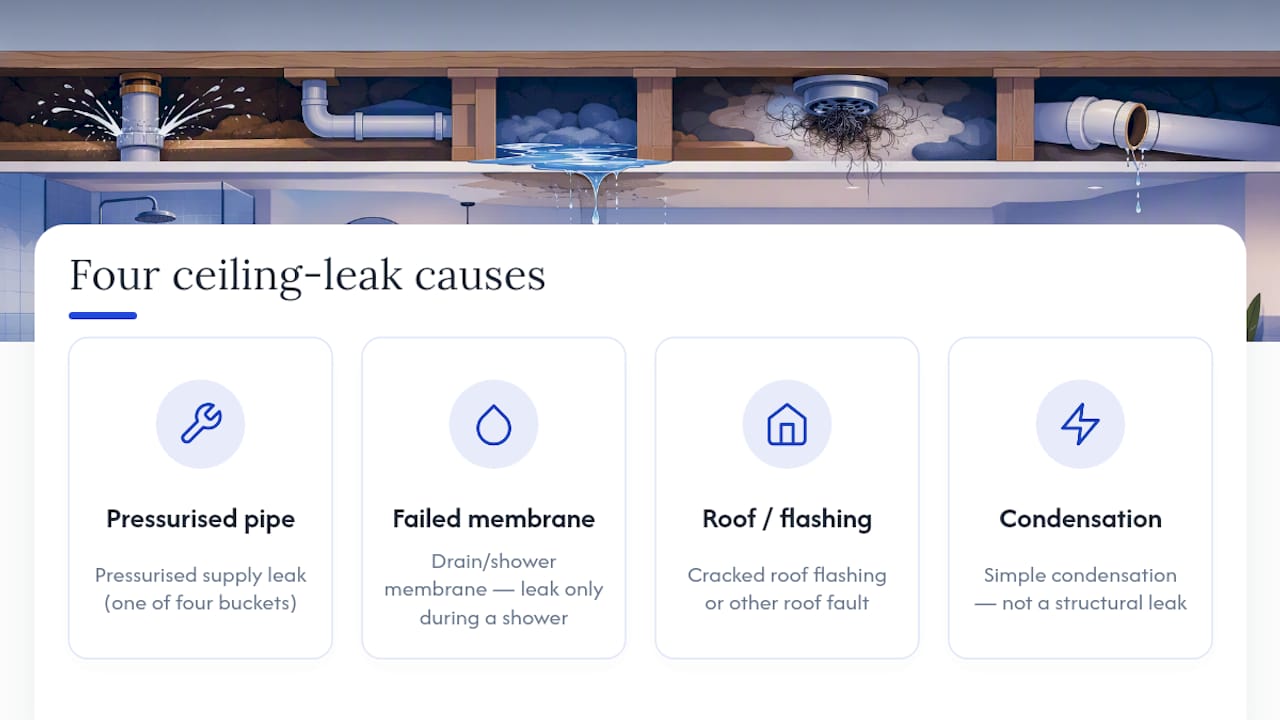
Conventional advice tends to treat "ceiling leak" as one problem with one fix. It isn't. A pressurised supply leak, a failed shower membrane, a cracked roof flashing and simple condensation all leave near identical stains on the plasterboard, and they need four completely different trades. I'd argue the water meter test and the paper towel test are underused not because they're hard, but because nobody tells homeowners they exist until after they've already paid for a callout that turned into "not my job."
If you take one thing from this, prioritise the diagnostic step over the panic step, once the immediate safety and containment work is done. A plumber who arrives knowing you've already ruled out condensation and confirmed the leak only happens during a shower will diagnose faster and charge less time for it than one starting from zero.
— Mike
Get an emergency plumber out for your bathroom ceiling leak
Dualflowservices is the practical alternative to guessing your way through a ceiling leak alone. Where a DIY approach leaves you juggling diagnostics, a plumber's phone number, and a tiler's phone number separately, we handle the plumbing side directly and coordinate with roofers and waterproofers when the cause sits outside our trade, so you're not the one chasing three separate businesses while your ceiling drips.

Our plumbers respond to emergency call-outs across the Mornington Peninsula for exactly this kind of job: active leaks, burst pipes, and water tracking down from a bathroom above. Before you call, grab the photos you took of the stain, note when the drip started and whether it's linked to shower use, and know where your main water shut off is. That handful of details cuts real time off the diagnosis once we're on site.
An emergency visit typically starts with the same safety checks covered above (power isolation, containment, water shut off) followed by the meter, dye or shower tests needed to confirm the source, then a straight answer on what's required to fix it. If the cause turns out to be a failed membrane rather than a pipe, we'll tell you that too rather than patching around it.
Book a call out or check availability through Dualflowservices and get someone qualified looking at the actual cause, not just the stain on your ceiling.
Sources
- Waterproofing inspections in Australia: scope, timing, reports and cost
- Ceiling sag: how to assess and relieve a bulge safely
- Water leaking from ceiling: causes, damage assessment, and repair options